Sunday, May 29, 2011

Old Forks Find New Life

If you're like me, you have a few extra, mismatched forks in your drawer.  Of course, they can come in handy when you have a few more guests than expected, but they can also find new life in your garden.
Forks make great plant markers.  Use the tines to hold the seed packet or label and press the handle in to the soil.


Use a fork to gently pry up seedlings that are ready to be transplanted.

The fork also works in place of a garden shovel in pots or small areas.


Digging in the dirt


The basil plant is transplanted, watered and ready to grow in to it's new pot. 
Many extras items have second uses.  Be sure to think outside of the box, or in this case, outside of the silverware drawer. 
Be well and happy gardening

Saturday, May 28, 2011

Plant Peppers with Matches

This tip comes from Jerry Baker, who has an amzing number of books on how to use household items in the garden.
He claims that burying a match book under a pepper plant will make the soil more acidic-via the sulphur in matches-which in turn makes for a happier plant. 
I'm not sure that my soil isn't acidic already, considering the amount of peat in the potting soil of my raised beds, but I'm curious and want to give this a try.
I have 2 bell peppers growing in a corner of my raised bed.  They came from the same 6 pack, and were planted at the same time (about 10 days ago). 

I removed the cover of the match book and buried the matches to the side of one of the plants.

While I'm not convinced that a book of matches can make a difference it was a cheap and easy experiment and I'm always interested in trying new ideas. 
I'll follow up with  results during the season.
Be well and happy gardening.

Thursday, May 26, 2011

Plastic Potato Tower

This morning I planned on making stepping stones for the garden.  That plan took a turn during my morning walk when I noticed some rolls of plastic fencing on the curb in front of my neighbor's house. It's simular to chicken wire, but it's made of plastic.  No gloves needed!

My neighbor explained it was used at a trade show and he hoped someone would reuse it.  What to do and where to do it were running through my mind as I picked it up and carried it to my yard.  I could figure out what to do with it later. 
After much thought, I decided it would make a good "potato tower" for growing some sprouting potatoes, with future plans to turn it in to a compost bin after the potatoes are harvested.
Using a trash can as a guide for size, I wrapped the plastic around the can and used garden clippers to cut the plastic.


I matched up the cut ends and used twist ties to hold the ends together.  Total time spent was less than 10 minutes.

Finding unused space in the yard was tough, but the area next to the grape trellis looked like the best spot.

It kind of fits in over there.


I raked up a couple of buckets of leaves for the bottom of the tower

Thats when I noticed that the potatoes I planned on using are not only past their prime, but worse they were slightly mushy.


Not having any other choice, I'm using the potatoes I have.  I covered the vines with about 3 inches of partially composted materials and moistened the area with a little water.  All done, quick and easy.  If I don't see vines soon, the cage will become a compost bin a bit sooner rather than later.
I'm anxious to see if this works.  I've seen potato towers in garden stores, and homemade projects made from chicken wire online.  Here's hoping my curbside find pays off.  Now, what to do with the rest of the roll?
Be well and happy gardening! 

Tuesday, May 24, 2011

Prickly prunnings deter pesky pests

Pest damage is an inevitable part of gardening. We all know that. Yet, who hasn't looked with shock and disbelief at the tattered remains of a seedling, or worse yet, a row of seedlings.
I've had a long running battle with a number of pests and I employ an arsonal of weapons to defend my plants from them.
In my garden, keeping things organic, sustainable and cheap is of the upmost importance, and this pest control method incorporates all of these concepts.
The plan here is to make your garden as inhospitable as possible using the stems and branches of prickly plants. 
The boysenberries that are growing in my yard are a thornless variety, but each season a few plants revert back to their prickly past.   

The boysenberries and Jasmine have taken over this fence. 

This is boysenberry season and the fruit is delicious.


The thorny canes are prunned down to ground level.  This work is best done with long sleeved gloves made for prunning roses.  Don't forget to use an old shower curtain to catch the clippings and make clean-up a breeze.

The leaves are cut off, and the stems are gently pressed into the ground around young seedlings, or anywhere I've seen evidence of slug and snail damage.

The vines have lots of thorns, large and small, and the slugs and snails seem reluctant to cross them, thus saving my plants from becoming their breakfast.

I hated when the neighborhood cats used my vegetable garden as a litter box.  I worried about the safety of my food crops since cat feces can lead to parasites in humans.  I've used a lot of methods to prevent this from happening, including using rose canes and lemon tree suckers (shoots that grow beneath the soil surface or graft union) to make my garden bed as uncomfortable as possible.
Clip off the flowers to enjoy indoors.
Use caution.  Rose thorns hurt!

Lay the stems in area's you don't want distrubed

Tomato and Peppers being protected.

Suckers from below the graft on the lemon tree.  The thorns are huge. 


These shoots, pressed  into the soil around my veggies, keep cats from choosing this spot for their bathroom breaks and, hopefully sends them to other, less painful  pastures.
Be well and happy gardening

Friday, May 20, 2011

More Compost Ingredients

Some people say making compost is difficult but I think they couldn't be more wrong.  Making compost is easy.  Gather some greens and browns, add some moisture, turn it to mix it up if you think about it and eventually you'll end up with compost.  It's microbial activity and decaying matter and it happens every day in nature.  No, composting isn't the hard part.  Coming up with enough organic materials is the hard part.  What do you do when the leaves aren't falling, there isn't enough grass clippings, and your kitchen scraps aren't cutting it?   What else can you use to fill your bin?  The following list has some common, and not so common brown and green materials.  This list isn't complete by any means, but you might see a thing or two that surprises you.
  • Browns:
Dead leaves, straw, corn stalks (shredded), shredded paper (newspaper or plain paper-not glossy), shredded documents and bills, pet hair, pine needles (may change ph levels, and is slow to decompose so I use them for raised bed material or mulch), saw dust & wood chips (from untreated wood), dried grass clippings, nut shells (avoid walnut shells), peat moss, wood ash, contents of the vacuum bag, lint from the dryer, stale bread & crackers, stale cereal, stale pasta, stale herbs and spices, coffee filters, egg shells, burlap sacks, cotton or wool clothing (cut in small pieces), cardboard (cut or torn in small pieces), wine corks (slow to decompose-better as mulch or for craft projects), nail clippings, those pesky crumbs on your kitchen counter
  • Greens:
Grass, shredded green leaves, deadheaded flowers and flower stems (cut into 1" pieces), kitchen scraps from fruits and vegetables, leftover cooked pasta (without meat, cheese or sauce), coffee grounds and tea leaves (large amounts may change ph level), sea weed (cut into 1" pieces), rotted manure, weeds (but watch for ones that don’t decompose well or that may have gone to seed)

I pour left over beer and wine in the compost bin.  Paul James (the gardening guy) says the yeast in beer is good for the pile and I figure the wine works about the same.  I don't know if there's any truth to this, but it's better than throwing it out. 

Getting enough stuff for your bin can be a challenge but the reward of finished compost makes it worth it.
Be well and happy gardening

Thursday, May 19, 2011

Expired supplements provide garden nutrients

Expired calcium and herbal supplements (not vitamins) don't need to be thrown out.

Bury a few expired calcium tablets or capsules around tomatoes, peppers and eggplants.  The additional calcium may help prevent blossom end rot.

Herbal supplements can be added to your compost bin where they will break down along with the other organic materials.

Remember to save the bottles and reuse when harvesting seeds as seed storage containers.

Waste not, want not.
Be well and happy gardening!

Monday, May 16, 2011

Saved Shower Curtain

Don't throw away your old shower curtains or other large pieces of plastic when there are so many ways to reuse them in your garden.  Placed under trees and bushes during prunning it will catch the clippings and make clean up easier.  When your finished with your work drag the curtain to your shredder, compost bin or green trash container for quick and easy disposal.

I placed one under the bird feeder Christmas tree (01/18/11 blog) it kept the falling birdseed from germinating.

After pruning the Christmas tree to make a green bean trellis (05/15/11 blog) I folded up the shower curtain and hauled the whole load of branches to the shredder in one quick trip.


I ended up with 2 buckets of pine mulch for my new blueberry transplants!

When an unexpected spring rain caught me off guard, I threw the curtain over the weed eater and bagged garden supplies, saving the hassle of moving everything quickly.

Reusing your trash is not only good for the planet, it can make your job a bit easier. 
Be Well and Happy Gardening!

Sunday, May 15, 2011

Christmas Tree Trellis

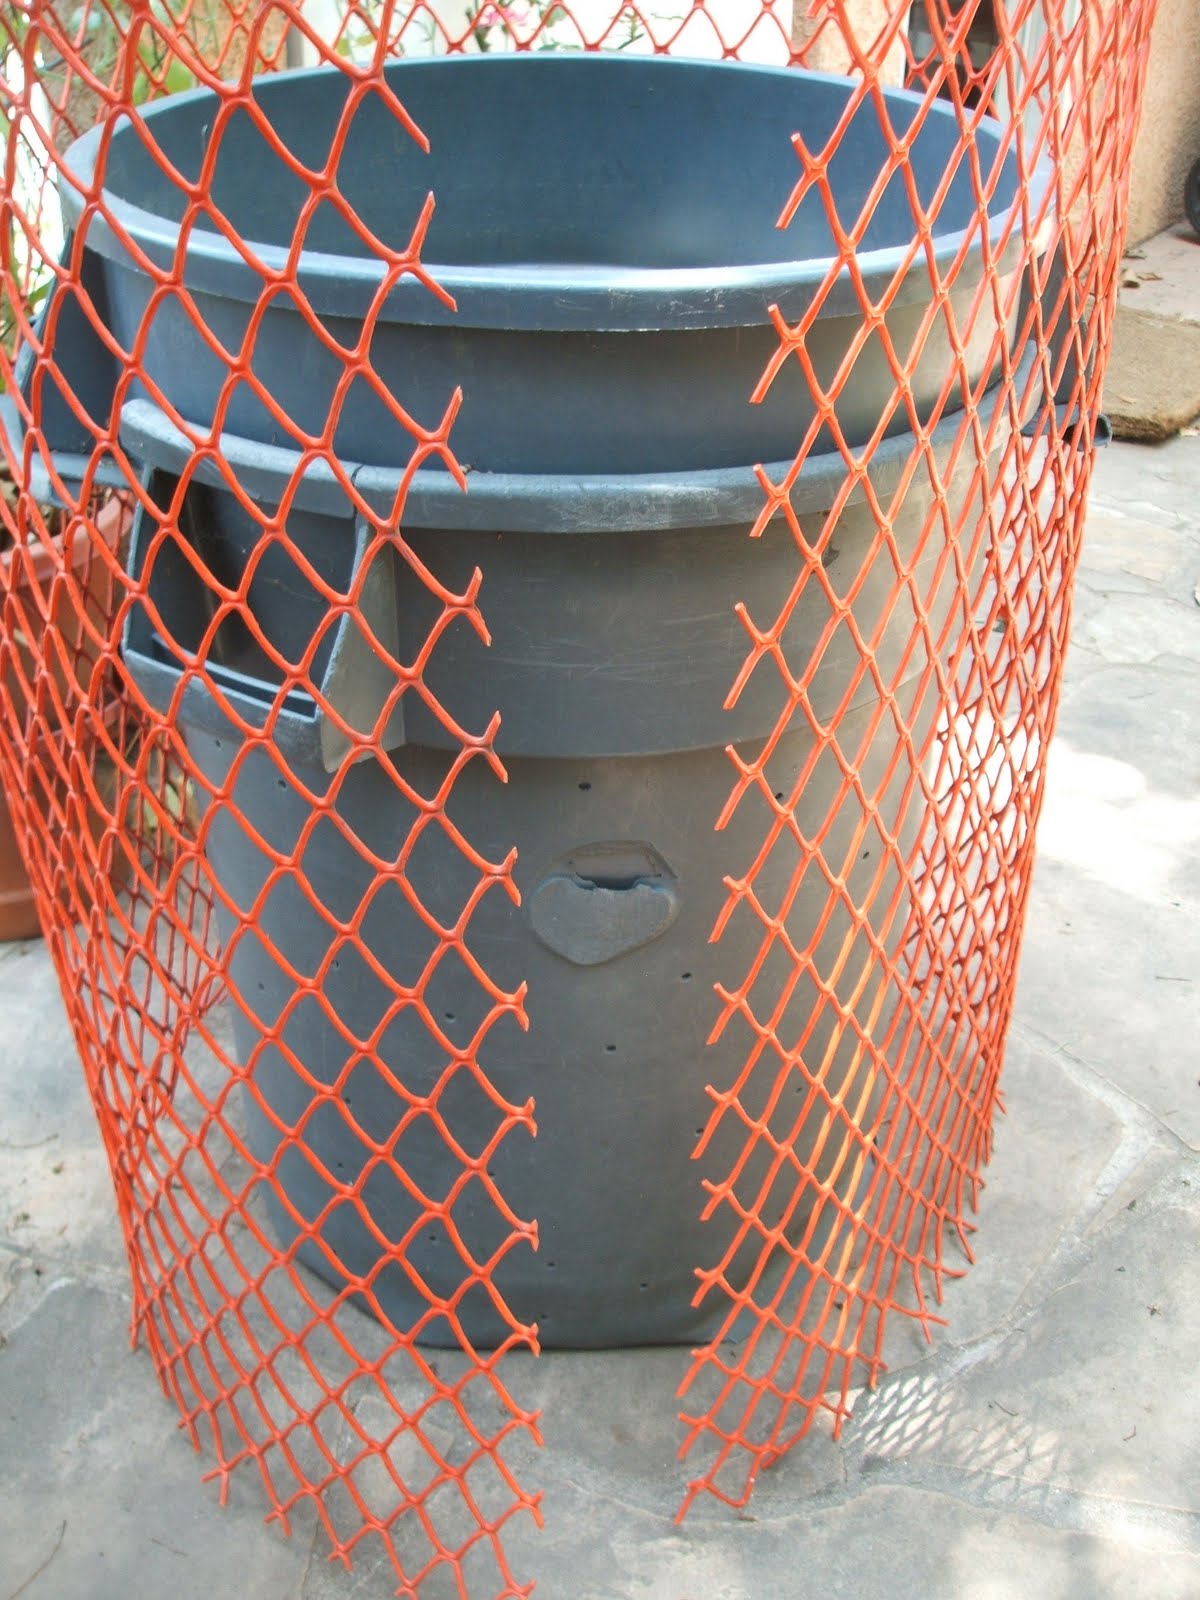
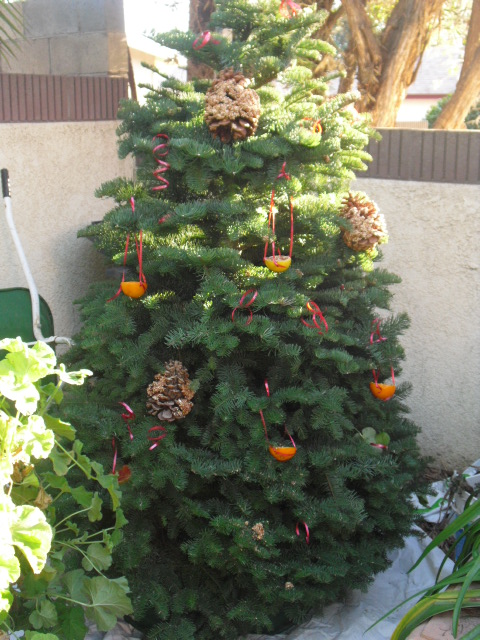
My Christmas tree continues it's transformation. At this point the tree that started as a holiday decoration, which turned into a bird feeding station (01/18/2011), later had it's branches shredded as mulch for the blueberries,(03/09/2011) now moves on to it's next life.
Today I'll turn my tree into a trellis for the green beans that are growing in a raised bed in my front yard.  I've had some doubt about this project.  The hesitation doesn't stem from thinking this won't work well.  I've done this before with terrific results.  My problem stems with where I will be placing my new trellis.  You see, I usually do this in the back yard, hidden from view so as not to upset my neighbors, or at the very least, leave them with the impression that I am whacky (that ship has sailed). 
This is a bit different.  It's in the front yard.  It's noticeable and weird.  It's a skelton of a dead Christmas tree standing in the middle of our front yard. 
My husband was the one who finally convinced me to do it.  He said "it's recycling, it's what you do".  I figure if he's ok with it then thats all that matters.  I just hope the beans cover it soon so it can become a focal point and not an eye sore.
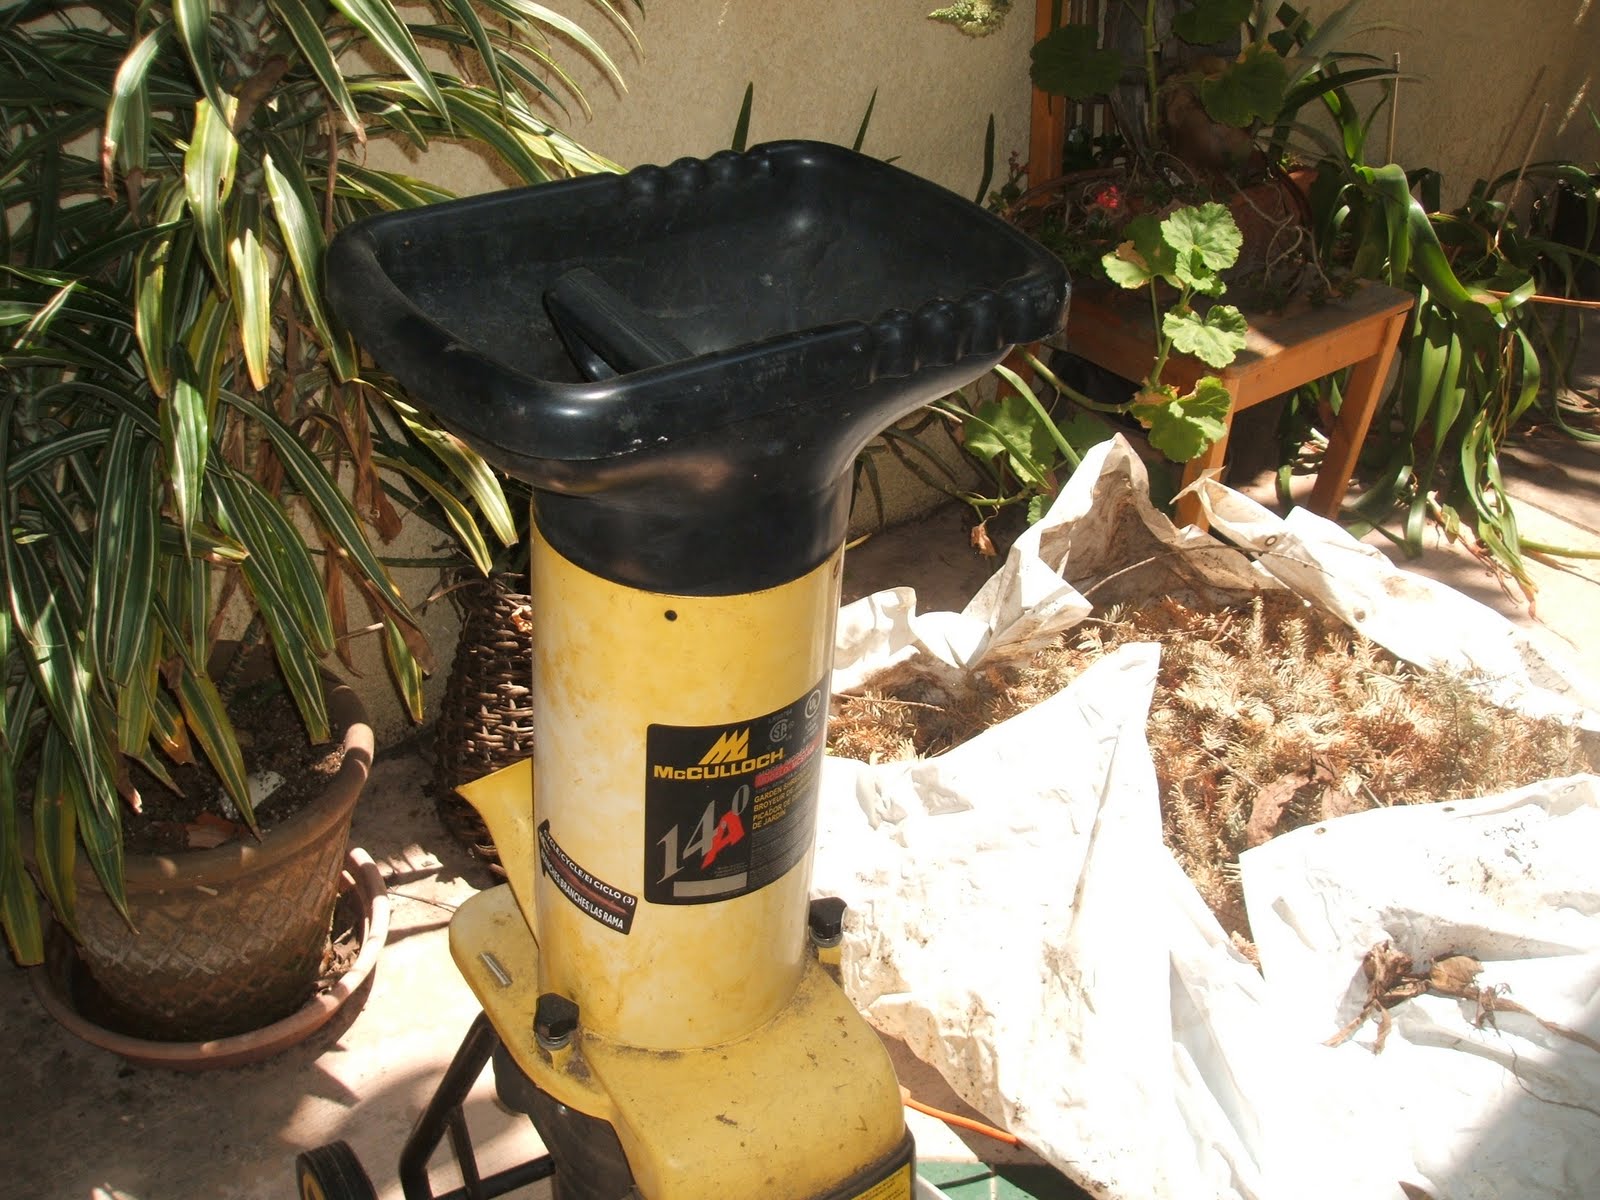
I pruned out the side branches and needles, leaving me with a tree that looked rather scrawny and sad.

All of the prunnings were put through the shredder and used as mulch around the newly planted blueberries.


The green beans have been growing around a "Texas tomato cage".  It's made of heavier wire than your regular cages and folds flat for storage.

I removed the cage from the soil and stuffed the tree through the wire cage.  It wasn't easy getting the tree in, and I broke a few branches, but eventually I got the tree in to it's stand. 

We cut off a few of the lower branches to make the trunk a bit longer.

My husband removed the pot and dug out a spot in the center of the green bean circle. 

We set the tree in the hole, pushing the feet of the tomato cage into the soil. 

We backfilled the soil around the trunk and checked to make sure that none of the green bean seedlings were being damaged by the edges of the branches. 

It doesn't look as bad as I expected.  In fact, it just looks like a dead tree surrounded by plants (and my husband)


It's not as shocking as I thought.  Still, I hope the beans take over soon.

05/20/2011
Follow up:
It seems the green beans were waiting for something to climb. 

The vines are starting to grow through branches.  I will post another picture next week to show further progress.

06/09/2011
Follow up: The vines are growing through and twining around the branches of the tree.
The weather has been cooler than usual at this time of year, but I expect as soon as it heats up the growth will explode.
Follow up:  Our Christmas tree trellis was a huge success.  It was completely filled with vines.  You couldn't see the tree at all.  The green beans were very easy to find and pick.


After the green bean crop was finished my husband cut off the remaining branches.  I put the branches through the mulcher and piled this all around the blueberry plants.  My husband sawed the trunk into small pieces and we set them aside to finishing drying. The branches will be used in the fireplace some chilly night and the resulting ashes will be sent to the compost bin,  Waste not!

Saturday, May 7, 2011

Water Wise Ways

Living in southern California has it's advantages. We have mild to warm winters and very hot summers. It isn't unusual to have peppers until late December, and tomatoes most of the year. With our Mediterranean  temperatures we can have home grown produce year round. What could be better than fresh picked tomatoes with winter greens?  The downside of this semi arrid climate is our lack of rainfall. With a season average of around 16" and with 3 of the last 4 years below that, drought is always a serious concern.  I try to save and conserve water everywhere that I can, and I'd love to share some of the ways I have a lush green garden while using less water.
Inside my house I leave buckets under the downspouts.  Large ones in the tubs, watering cans and smaller buckets in the sinks.


When heating water for showers or dishwashing, fill the buckets and use on plants, or use the water for flushing toilets.
To harvest rainwater I have 3 rain barrels set below my downspouts.  Actually they are heavy duty trash cans that I convert to potting soil containers in the summer.  The rain gutters are cut at  the correct height for the barrels, and I surround these barrels with 5 gallon buckets waiting to handle the overflow. 

If we are hit with a few hours of serious rainfall the buckets will be full. At this point you would see me scrambling around (soaking wet) trying to find more containers.  All this running around nets me a week or more worth of free water for the raised beds and container plants.
Hanging plants conveniently drain on to potted plants placed underneath.

Our patio drained onto the lawn, which was a waste of water in my opinion, so we placed a plastic drain on the end of  pvc pipe and buried the pipe under the soil.


The water drains into the vegetable garden.
Having a lawn can be pretty, but the water use can be hard to justify.  Warm weather grasses (like St. Augustine) can tolerate more heat and less water.  I try and get by with one day of watering a week through all but the hottest of summer months.  By placing raised garden beds on my front lawn, I grow 3 seasons of crops a year.  The beds cut down on the lawn mowing and watering, and I am rewarded with local organic produce.

My back yard isn't used for pets or children so I reused the lawn space as a mini orchard.  I placed 7 potted  fruit trees (semi dwarf) and a raised bed right in the middle of it.

 Now when I water, much of it is used on fruit trees and edible plants.  Lawn cutting and edging also takes less time.  By saving water where I can (lawn and ornamentals) and using it where I need it most (potted plants and edibles) I keep my water bill below the average for our area.  As a gardener and environmentalist I call that a job well done.