Wednesday, July 6, 2011

Saved Silica Gel Packs

I've been saving silica gel packs for years.  You know what I'm talking about...the pesky little packets that you find in every bottle of vitamins, box of shoes or at the bottom of a new purse.  Those little things are everywhere and I knew that there had to be a way to reuse them.

Silica gel is actually a naturally occurring mineral.  The silica gel's high surface area allows it to absorb moisture easily making it useful as a drying agent. 
I wasn't sure how I was going to reuse the packets until I  read a tip from a reader in a crafting magazine.  She saved her packs and used them to dry flower petals for potpourri and sachets.  It was an "ah ha" moment.  I knew I had kept them for a reason.   
Last year I decided my Christmas gifts would be from the heart and hand (and 100% recycled) and one of the gifts were rose and lavender sachets.  Over the summer I picked my most fragrant roses just as they reached full bloom and placed the petals in the covered box of silica gel.  The petals dried quickly without any mildew and the petals retained their fragrance.
I mixed the petals with dried lavender buds and a couple drops of rose sachet oil that I had on hand. 

My sachet holders were circles cut from a old piece of lace saved after my wedding, and the ribbons are reused.


Continuing my quest to be ecofriendly I included a few thoughts on how to reuse/recycle this gift.
The tag reads:
Rose and Lavender Potpourri
Prepared from fresh and dried
Rose petals and Lavender buds
Rose sachet oil
Once the scent has faded this sachet can
be recycled by composting
the petals and buds, or by scattering
them in your yard where they
will decompose

 Be well and happy garden gift giving!


Tuesday, July 5, 2011

Leftover Laundry Jugs Water Thirsty Plants

One of the best ways I know to keep my carbon footprint low is to find 2nd uses for everyday items.  This can be a bit of a challenge at times but keeping things out of the landfill, and even the recycling plant is one of my goals in life. 
I purchase laundry detergent in the large size (less packaging) and the bottle has a great afterlife as a watering can.
All you need is an empty, rinsed out laundry detergent bottle and a drill.

Place the cap upside down on a flat surface.  Don't do this on your dining room table.  You'll be drilling through the lid and that won't be good for your table.  I use a heavy piece of wood on top of my planting table when I'm using a drill.
I like to put lots of holes in the lid, about 15 or so.  This doesn't take much time but you may have to run your drill in reverse to get the drill bit out of the lid. 

Thats it, just fill with water and carry out to your thirsty plants.
I keep containers by my kitchen door and fill them when I'm warming water before running the dishwasher or shower. 
Give a quick tip of the jug for a gentle splash of water or squeeze the sizes to get a steady stream going. 
Be well and happy gardening!


Monday, July 4, 2011

Eraser Easily Sows Seeds

I got this tip out of a garden magazine years ago.  I don't know how this clever gardener came up with the idea, but it's a great one and I'm happy I can pass it along.
To make sowing seeds quick and easy, use a pencil with an eraser.

Pour some seeds out of your packet.
Dip the eraser in water. 
Touch the eraser to one of the seeds.  The seed will latch on to the eraser like they were magnets.

Place the eraser on the soil, pressing down to the desired depth.  Give the pencil a twist and the seed will come off in the soil. 

Press the soil over your seed.  Give it some water and it's ready to grow.
Using this method I can finish my seed sowing in record time.  I don't even have to moisten the eraser again.  The moisture from the soil is enough to keep the seeds sticking to the eraser.
Be well and happy gardening.

Thursday, June 30, 2011

Wine Bottle Border

I bought quite a few blueberry plants this spring.  I didn't need them, didn't even know where to put them, but it was an end of the season, 1/2 off sale at Peaceful Valley Farms.  Who could resist? 
With the need to get the plants in the ground before the late season heat set in, my husband and I dug holes in the lawn and planted them right there in the grass.  This didn't work out well.  The scrawny plants kept getting stepped on or I would drag the hose over them while watering.  I tried using bricks and metal cages to protect them but it wasn't working and I knew it wouldn't be long before the plants would be dead.
I've seen projects using wine bottles to edge pathways and borders, and I thought I would give it a try around my berry plants.
I work in a restaurant so I have easy access to lots of empty wine bottles.  I also love wine, so it wasn't hard to come up with enough bottles for this project, however one border takes 20 bottles so if I'm going to edge around all my berry plants, or along a pathway for that matter, I better get crackin' on drinking/saving bottles.

I start by digging out a circle around the blueberry plant.


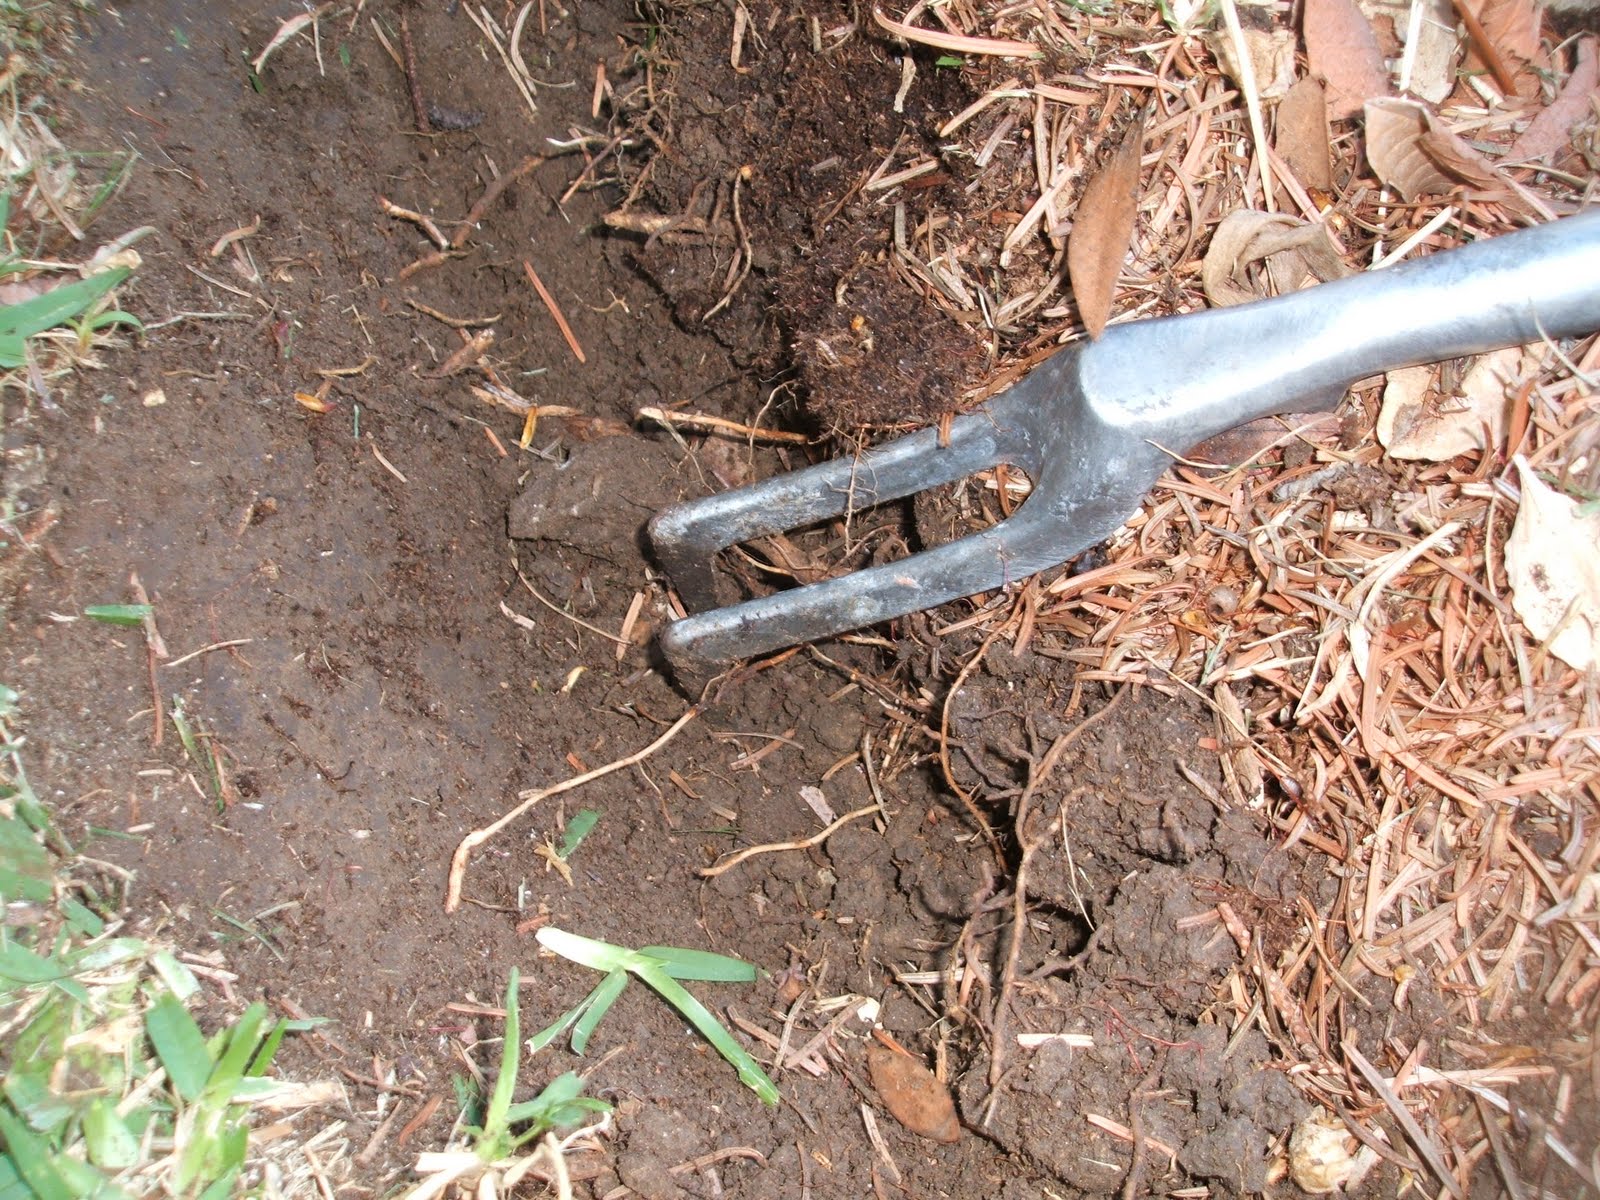
I used a garden fork to further loosen up the soil.

I placed a bottle upside down in the hole.  I don't have a mallet so I placed an old rag on top of the bottle and used a brick to pound the bottle in the soil. 

The brick worked ok, but you can't really strike the bottle as hard as needed to enbed it deeply in the soil. 
Since that was all I had to work with I continued around the circle, loosing the soil with the fork, removing the soil from the circle, adding the next bottle and pounding it in place. 

When I got to the end of the circle it took a bit of time (and work) to make the bottles fit correctly.  I think this was the most difficult part of the whole project.
Around this time my neighbor came over to see what I was up to.  He's used to seeing the unusual happenings that go on here and he was looking for the source of the noise I was making.  He lent me a rubber mallet which allowed me to strike the bottles hard and made finishing the job a breeze.  I know what I'll be asking my husband for on my next birthday.

I back filled around the bottles with the soil I had removed and added some mulch around the plant and bottles.


The bottles are buried deep enough that they won't move if a hose gets caught on it, and the plants will be protected from foot traffic.
Now I just have to hope I won't trip over it.
Be well and happy gardening!

Update 04/20/2015:
My wine bottle border stayed up for quite a while.  At the end of 2014 I pulled up the bottles and the blueberry plants.  The bottles were used to surround a bed of fruit trees and flowers. 


FYI, I use the weed eater right up against the bottles.  The weed eater has a guard that can be lowered to prevent damage to trees, fences etc.

Friday, June 24, 2011

Pizza Box Stepping Stones

I saw this garden project in a book titled "Trash to Treasures 1" by Leisure Arts.  These stepping stones use mostly recycled items.  The only item purchased was brick mortar.  The bag cost me about $3.00 and I used 1/4 bag so the stepping stones cost just .75 for 2. 
The recycled items are:
pizza boxes - I made a 13" and a 9" stone
dry cleaner hangers
dry cleaner plastic bags
pebbles, tile, shells etc.
You will also need:
duct tape
sand paper (optional)

Cut off the top of the pizza box. 

Reinforce the sides of the box with duct tape.

Line the box with the plastic.  Creases in the plastic will mean creases in your finished stepping stones so smooth it out as much as possible.  Some of it can be sanded down later but you can't fix everything.

Use the clothes hangers to reinforce the stepping stone.  For the larger stone use 4 hangers.placing one of the "hooks" in each of the corners of the box.  For the smaller box I twisted the hanger and placed it inside of the box.

Mix the mortar with water using an old bucket and shovel.  I don't know what's in the mix, but be safe and use a dust mask or some other covering over your mouth and nose.
The best consistancy of the mortar is slightly thick.  If your mix is too thin your decorations will sink, if it's too thick they won't stick when the mortar is dry.  Pour the mortar into the boxes, smoothing it out with the back of the shovel.

Next comes the best part, the decorating. This would be so much fun to do with children! 
I used leftover tile and pebbles from our patio and yard.


I let the stepping stones sit through a couple of hot days to dry completely. 
Using a stiff scrubber I cleaned off each of the tiles and stones, then used a damp cloth to wipe everything clean. 

Tip the stone out of the box and pull off the plastic.  If you have some rough edges you can sand them down, but I think they look a bit rustic and plan to leave them just like they are.

Be well and happy gardening.


Thursday, June 23, 2011

Terrific Recycled Terrarium

I had a few small succulant's waiting for a home.  They were the offspring of some larger plants.  There they were,c sitting in an empty pot on my garden table, no soil or water and still managed to stay alive.  After all they had been through it seemed unkind not to do something with them.  
I saw a centerpiece at a retirement party that gave me inspiration for this project.   It used a "fishbowl" type vase and small succulants.  I had both on hand although any deep bowl or vase would work for this.  I couldn't locate sand anywhere, so I purchased a bag at my local hardware store.  50 lbs of all purpose sand cost $2.25, and I used about 10 cups so I have a lot left for other projects.  The only other items I used were a few stones and some potting soil.

I placed a few stones (river rock) in the bottom of the vase and topped it with about an inch of sand.

I mixed 2 parts potting soil with one part sand to make a well drained mix and used it to top the sand. 

On top of the soil I added another inch of sand, smoothing it out like I was icing a cake.

I gently placed the pebbles in the sand.  I chose a  "fork in the road" design because it seemed simple, but I might try something a bit more challenging next time.


I added the plants last, pressing them gently into the sand.  Trying to change the placement can be messy so it's best to make sure you're putting them where they will be staying.

Water gently with a sprayer or mister.
This easy to care for centerpiece looks great on my patio table.

Be well and happy gardening.

Sunday, June 19, 2011

Recycled Compost Sifter

Readers of my blog know I'm crazy about composting.  It's the ultimate trash to treasure, taking browns and greens and turning it into black gold.  I'm always making compost and eagerly look forward to the finished product.  When the contents of the bin have decomposed to 1/3 of it's original size, and I can no longer identify the materials I added, it's time to sift my compost.
There are some wonderful compost sifters out there.  Most garden catalogs carry them and I've seen homemade ones that look like they work very well.  I have an easier way to sift my compost.  Nursery garden flats! The flats are lightweight, have different sized holes to choose from, and can still be used to tote your nursery packs from spot to spot when not used as a sifter.
 
Stack 3 or 4 flats together, placing the smallest desired hole size on top.  I sift over buckets, an empty trash can, or a wheel barrow.  Don't forget to use an old shower curtain under everything to make clean up easier.

The finished compost can be used as a growing medium, soil amendment, or fertilizer.

I resift the left over (larger) pieces using flats with larger holes.

I use this as mulch around fruit trees and other plants.
The largest pieces go into the current compost bin, topping off recently added kitchen scraps and adding worms and decomposing microbes to the pile. 
 Be well and happy gardening!