Sunday, June 19, 2011

Recycled Compost Sifter

Readers of my blog know I'm crazy about composting.  It's the ultimate trash to treasure, taking browns and greens and turning it into black gold.  I'm always making compost and eagerly look forward to the finished product.  When the contents of the bin have decomposed to 1/3 of it's original size, and I can no longer identify the materials I added, it's time to sift my compost.
There are some wonderful compost sifters out there.  Most garden catalogs carry them and I've seen homemade ones that look like they work very well.  I have an easier way to sift my compost.  Nursery garden flats! The flats are lightweight, have different sized holes to choose from, and can still be used to tote your nursery packs from spot to spot when not used as a sifter.
 
Stack 3 or 4 flats together, placing the smallest desired hole size on top.  I sift over buckets, an empty trash can, or a wheel barrow.  Don't forget to use an old shower curtain under everything to make clean up easier.

The finished compost can be used as a growing medium, soil amendment, or fertilizer.

I resift the left over (larger) pieces using flats with larger holes.

I use this as mulch around fruit trees and other plants.
The largest pieces go into the current compost bin, topping off recently added kitchen scraps and adding worms and decomposing microbes to the pile. 
 Be well and happy gardening!

Friday, June 17, 2011

When Life Gives You Banana's Make Bread-And Fertilizer

My local store sells overly ripe banana's for a dime each.  I can't pass them by.  I make some great banana bread (just ask my family and neighbors) and you gotta have ripe ones for the best bread.  I usually buy all they have, freezing the peeled fruit until I'm ready to bake.

Enough for 2 batches

The peels could easily be composted, but I prefer to use them as fertilizer for my roses.

Banana peels are a good source of potassium and also supply a bit of phosphorus.  They have an NPK of 0-3-42.

My favorite way to use the peel is to cut it into small pieces and freeze it before using.


The freezing changes the cell structure of the peels and as they thaw they break down more quickly in the garden.

When the peels are frozen, dig a couple of holes around your rose bush and bury about a cup of peels in each one.  Cover with soil to keep rodents from digging them up. 

Some google searching found other (interesting) ways to use banana peels.
1. When transplanting roses, place a banana peel (and some say a tea bag) at the bottom of the hole.
2. Put peels in a 350 degree oven and bake until crisp, than bury next to your rose bushes.
3. Freeze and put through a food processor than bury around your plants
4. Make banana-peel tonic. Cut the peels of a banana into a spray bottle and cover with warm water. Put the lid back on the bottle and leave for 2 weeks. The peels will ferment. Spray the rose bushes with this liquid.
I plan to give these other methods a try, and would love to hear from readers who use banana peels around their plants.
Be well and happy gardening.


Tuesday, June 14, 2011

PVC Pipe Does Deep Irrigating

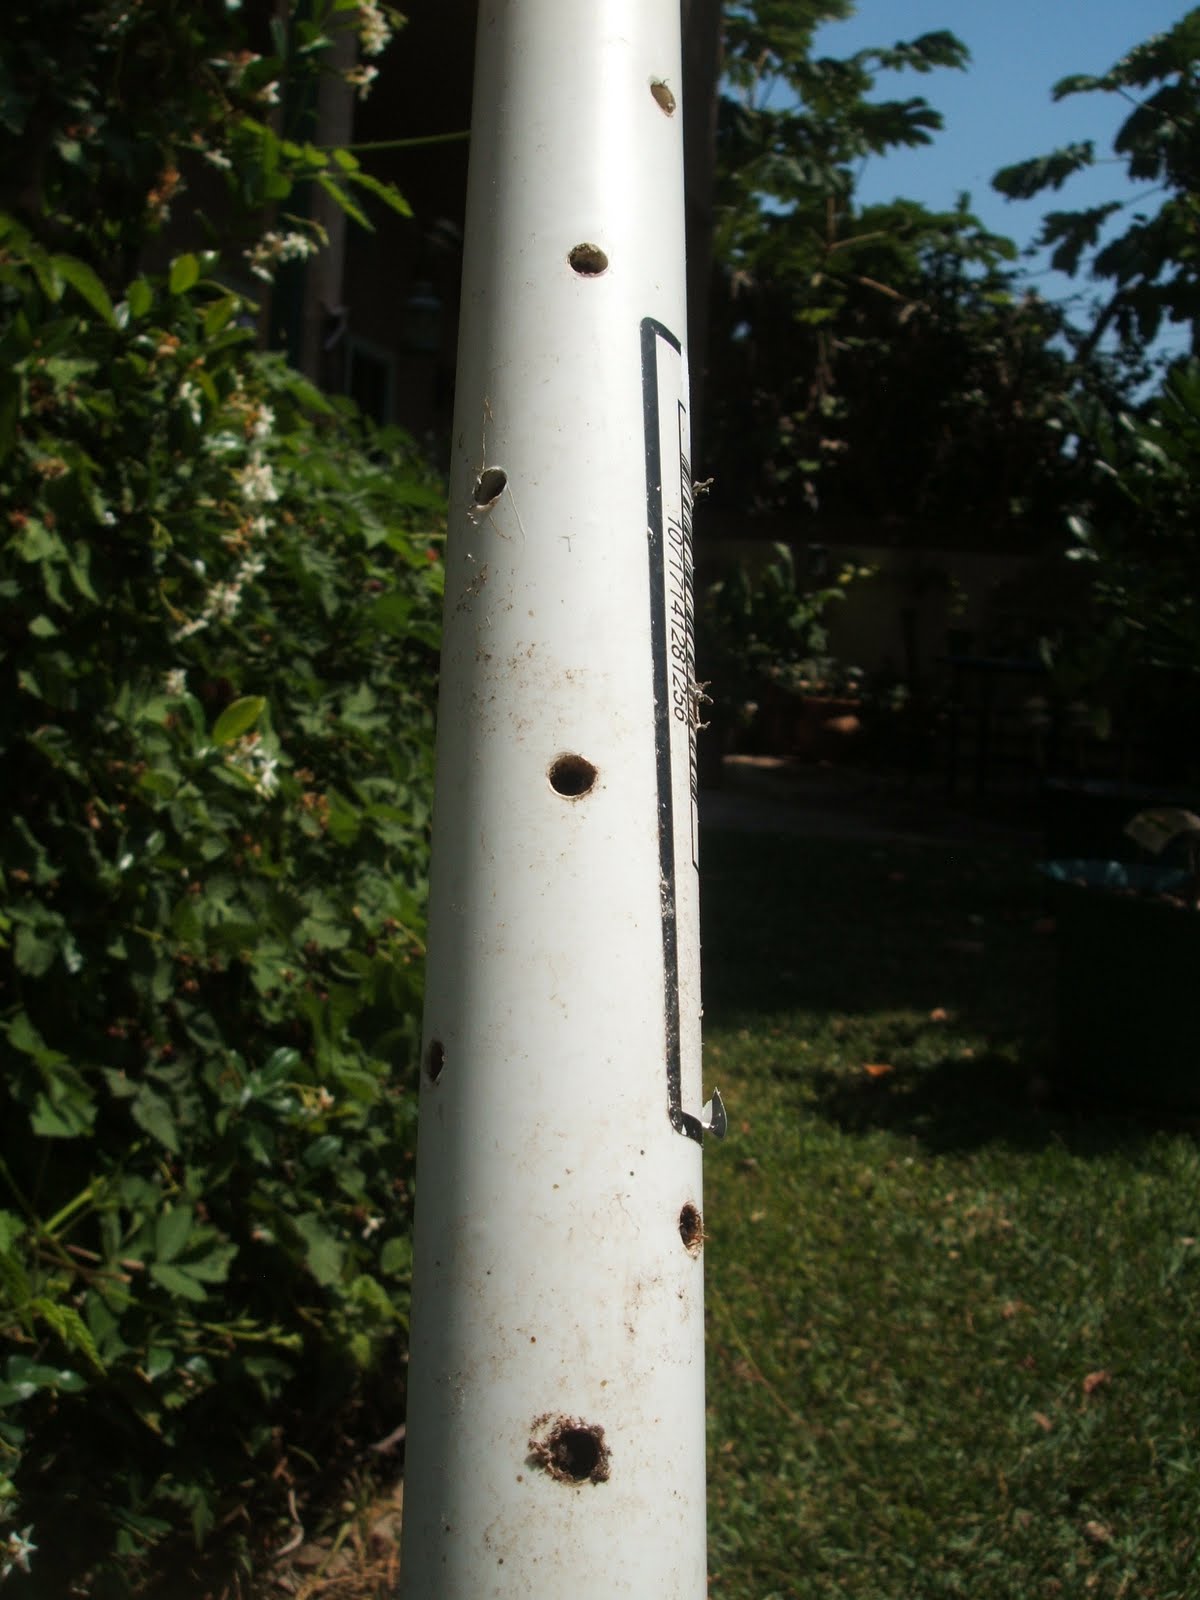
I like to use my strawberry pots to grow herbs and other annuals, but getting water and nutrients to the roots of the plants was difficult.  My husband solved the problem with a piece a PVC pipe, a pipe cap, glue and a drill.  I wish I had pics of him making these, but I've actually been using this one for a few seasons so I'll just have to give some details.
The pipe he used was 1 1/4" in diameter, but any left over piece would be fine.  If you don't have a cap on hand (and who does) you'll have to hit your neighborhood hardward store, but the piece was pretty cheap.
He cut the pipe so that it was about 1 foot higher than the pot and glued the cap onto the pipe.  He drilled random holes through the lower 2/3 of the pipe.


I used an old piece of rebar to loosen the soil


The rebar makes room for the pipe to go in


The pipe makes it easy to get water to the roots of the plant. 


By adding liquid fertilizer, compost tea or worm tea to the pipe you can get nutrients to where they are most needed. 
Be well and happy gardening!

Thursday, June 9, 2011

Instant Garden Beds

I'm always searching for new places and new containers for all of the plants I bring into my garden. 
This spot has been sitting empty for a while as not much has done well here. 

The mini bed has 2 small sides built around an old clothesline that I have used as a trellis.  Either the small size of the beds or the lack of sun exposure has caused my crops to be less than impressive here.
I saw this garden tip in the August 2000 Organic Gardening magazine. I thought it looked like a quick way to get a new garden bed going by planting directly in bagged potting or topsoil.
I cut 8 to 10 drainage holes on one side of the bag and laid it out (with the holes on the bottom) where I wanted the garden bed to go.

I cut a large X in the top of the bag and tucked the plastic flaps inside the bag.


I added some organic fertilizer and worm castings and watered the bag well.

I planted a "Sunburst" cherry tomato seedling in the soil.  I used a flat rock and some green paint for the plant marker.

Once the tomato plant gets growing I plan to add a bit more potting soil and top it off with some mulch from the compost bin. 
Next season I can reuse the potting soil in another project, or pull the plastic away and try direct planting once more.
This project was so easy that I'll be making 2 more instant garden beds with a couple bags of soil that I have on hand.  Looks like I will finally be planting the rest of the seedlings I started earlier this spring. 
Many thanks to Kit Kellison of Chesapeake, Virginia who submitted this tip to OG magazine.
Be well and Happy Gardening

06/11/2011
Follow up:
I added 2 more instant garden beds in front of my kitchen window. This area gets some afternoon sun, but the house shades it from the worst heat.

The pot in the center of the bags is filled with manure (good nitrogen source for greens) and organic fertilizer.  When I add water I'm feeding the plants and watering deeply at the same time.

The seedlings I'm using are transplants from the micro greens that I started earlier (04/11/11blog).  One planter will get mixed lettuce and the other gets the spinach.

I hope that the part sun/part shade combo this bed gets will keep the greens going a bit longer into the season.

Sunday, May 29, 2011

Old Forks Find New Life

If you're like me, you have a few extra, mismatched forks in your drawer.  Of course, they can come in handy when you have a few more guests than expected, but they can also find new life in your garden.
Forks make great plant markers.  Use the tines to hold the seed packet or label and press the handle in to the soil.


Use a fork to gently pry up seedlings that are ready to be transplanted.

The fork also works in place of a garden shovel in pots or small areas.


Digging in the dirt


The basil plant is transplanted, watered and ready to grow in to it's new pot. 
Many extras items have second uses.  Be sure to think outside of the box, or in this case, outside of the silverware drawer. 
Be well and happy gardening

Saturday, May 28, 2011

Plant Peppers with Matches

This tip comes from Jerry Baker, who has an amzing number of books on how to use household items in the garden.
He claims that burying a match book under a pepper plant will make the soil more acidic-via the sulphur in matches-which in turn makes for a happier plant. 
I'm not sure that my soil isn't acidic already, considering the amount of peat in the potting soil of my raised beds, but I'm curious and want to give this a try.
I have 2 bell peppers growing in a corner of my raised bed.  They came from the same 6 pack, and were planted at the same time (about 10 days ago). 

I removed the cover of the match book and buried the matches to the side of one of the plants.

While I'm not convinced that a book of matches can make a difference it was a cheap and easy experiment and I'm always interested in trying new ideas. 
I'll follow up with  results during the season.
Be well and happy gardening.

Thursday, May 26, 2011

Plastic Potato Tower

This morning I planned on making stepping stones for the garden.  That plan took a turn during my morning walk when I noticed some rolls of plastic fencing on the curb in front of my neighbor's house. It's simular to chicken wire, but it's made of plastic.  No gloves needed!
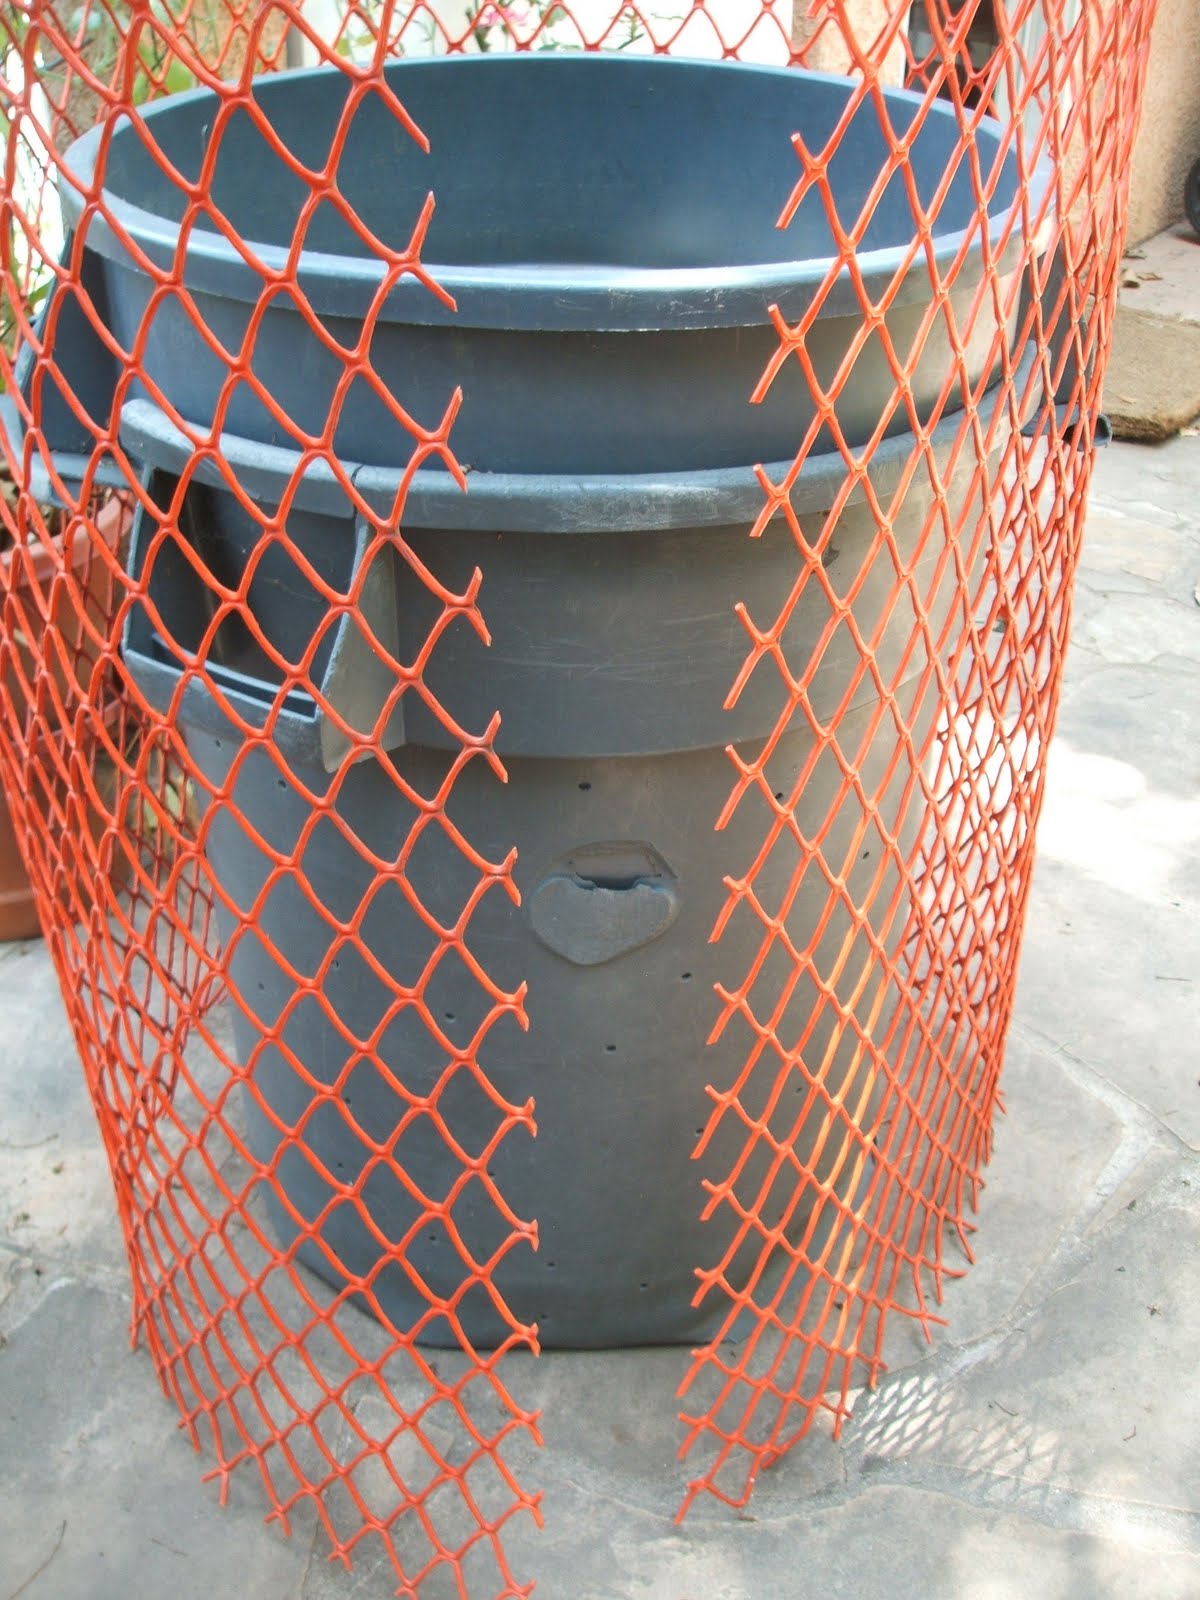
My neighbor explained it was used at a trade show and he hoped someone would reuse it.  What to do and where to do it were running through my mind as I picked it up and carried it to my yard.  I could figure out what to do with it later. 
After much thought, I decided it would make a good "potato tower" for growing some sprouting potatoes, with future plans to turn it in to a compost bin after the potatoes are harvested.
Using a trash can as a guide for size, I wrapped the plastic around the can and used garden clippers to cut the plastic.


I matched up the cut ends and used twist ties to hold the ends together.  Total time spent was less than 10 minutes.

Finding unused space in the yard was tough, but the area next to the grape trellis looked like the best spot.

It kind of fits in over there.


I raked up a couple of buckets of leaves for the bottom of the tower

Thats when I noticed that the potatoes I planned on using are not only past their prime, but worse they were slightly mushy.


Not having any other choice, I'm using the potatoes I have.  I covered the vines with about 3 inches of partially composted materials and moistened the area with a little water.  All done, quick and easy.  If I don't see vines soon, the cage will become a compost bin a bit sooner rather than later.
I'm anxious to see if this works.  I've seen potato towers in garden stores, and homemade projects made from chicken wire online.  Here's hoping my curbside find pays off.  Now, what to do with the rest of the roll?
Be well and happy gardening!