Thursday, May 5, 2011

Crazy for Composting

Anyone who knows me knows I'm crazy for composting.  It's actually a favorite hobby of mine-turning garden waste into black gold.
Here's a couple of facts to keep in mind-24% of what we throw away each day can be composted.  That's almost 1/4 of our trash each and every day.  Annually, composters keep 529 lbs. of home and garden waste out of our landfills. Think of all the "trash" that would be kept out of the landfills if every house had a compost bin.  If that isn’t enough reason to compost, how about this: compost improves soil structure and water holding capacity, repairs damaged soil, increases earthworm activity, suppresses disease and keeps plants healthier. It's also one of the best ways to return to the earth what we have taken out, ensuring the success of future harvests.
At present, I have 7 compost bins, 3 worm composting bins, 2 compost tumblers and a never ending need for more finished compost.

 
My very first compost bin, with a box of seedlings growing on top

 
3 compost bins in a side yard

 
A compost bin next to the kitchen door

 
A compost bin by the back door

 
A worm bin next to my front porch steps

 
                                                              My first worm bin
As hard as I try to keep the bins full, it's tough to keep up with the demand for organic materials.
I've had to get creative in my effort to score as much organic waste as possible.

 
It would take forever to fill a bin with just my kitchen scraps

 
Kitchen scraps from the restaurant where I work

 
I arrived at work early just to sweep up some of the leaves from the parking lot

 
Mulched branches and leaves from our avocado tree.  The tree was pruned
by professionals and all of the materials were left on site

 
Magnolia pods from the tree in our front yard.  They also work great as a base for raised planters

 
My electric mulcher, edger and leaf mulcher. 

 
Junk mail and personal info go in to the shredder before being added to the compost bin.

To those who think they don't have enough garbage to have a compost bin, YES you do! You have more than enough stuff.  All of us have enough stuff.  Get creative.  Ask friends and family for help.  Visit a Starbucks or Seattle's Best and bring a container to take home coffee grounds.  Rake your neighbor's yard (if they don't use pesticide's) or sweep up the streets for leaves.  Ask friends and family for grass clippings (untreated with herbicides).  You can do it.
It's fun to see what you can come up with once you start looking for it. 
Be well and happy gardening!

05/19/2011
Follow up:
Great messages below!  What to do with all of the paper that comes into the household was a really important question to me, and I spent some time on the internet researching the best ways to deal with it.  According to a very comprehensive report done in the UK, the most environmental way to “dispose” of paper waste, in order is:
1.       Compost
2.       Recycle
3.       Incinerate
4.       Landfill
Using this as a guide, I separate paper products for different reuse.
Tissues, paper napkins, receipts, etc-compost, use with kindling for a fire in the fireplace
Newspapers-base for raised beds, worm composting material, occasional donation to school or scouts
 Envelopes-scratch paper, shred for compost bin (remove plastic windows)
Non-sensitive paper-reuse in printer, shred for compost bin
Sensitive paper-shred for compost bin
Plain white paper (no print)-set aside to reuse in homemade paper seed cards (upcoming Fall blog)
Non glossy junk mail-shred and add to the compost bin, add as a layer to a raised bed (Lasagna gardening)
Glossy junk mail-recycling bin
By the way, despite the above methods, the use of cloth napkins and hankies, and having my name removed from mail marketing lists, I still accumulate a great deal of paper.  I don't know why that is, or how we haven't progressed to a treeless world, but it's just the way it is.  I guess it's time for another compost bin and raised bed.

Tuesday, May 3, 2011

Seed Starting Tapes

I've seen seed starting tapes in the garden center.  It seems like such an easy way to plant seeds.  Just make a furrow, unroll the seed tape and cover with a bit of soil.  What could be easier?  The only set back was the price.  For what seemed to be the cost of a pack of seeds, you only had enough product for a row or two.  This tip shows how to make a seed tape using items you already have around the house.  For this project you will need:
newspapers
scissors
flour
water
seeds
I started by cutting the paper in to 1" strips and folding each of the pieces of paper in half length wise.


I made a paste out of the flour and water, making it the consistancy of pancake batter.

Place dots of the paste on the newspaper, spacing the dots according to the seed starting directions. 

On each dot place a seed.

Fold the paper over and seal the top to the bottom by pressing down.  The paste acts as a glue to stick the two halves together. 

This project went so quickly that I finished 5 rows (approx. 2 feet each or 10 feet in total) in just minutes. 


The seeds tapes can be planted now, or rolled up, sealed in a bag and stored for future use.  I was using some left over seeds, so it cost very little to make these seed starting tapes.
This would be a fun project to do with children or granchildren. 
Many thanks to Sandi Bloms of North Dakota.  She submitted this tip to Garden Gate magazine and it appeared in the Feb. 1996 issue.

Follow-up 05/05/2011
I planted the seed tapes in a bed that was ruined by a rogue raccoon.  Hopefully he will leave the bed and seedlings alone, but you can't fight the wildlife.

Seed tapes placed in furrows
10-2 foot rows
5 Beets -Golden
2 Swiss Chard - Bright lights
1 jalepeno chile
1 habanero chile
1 poblano chile

I covered the seedlings with a light layer of potting soil.  I replanted some green bean seeds that hadn't germinated, and I added a plastic pot in the center of the beans.  I like to reuse old plastic containers to fertilize and deep water my gardens.

I hope to follow up soon with new pictures of my summer garden. 

05/20/2011
Follow up:
The seed tapes with the swiss chard and the beets are sending up seedlings. 


I don't have any seedlings from the pepper plants yet, but those seeds generally take longer to germinate, especially if the soil temperature is still cool.
Watch for weekly follow up pics.


Sunday, May 1, 2011

Take Out Seed Starting Tray

I picked up a few new packs of seeds the other day.  I didn't really need anything new, but I was at the garden center and I can easily be swayed to spend a few dollars for another variety of summer edibles.  It's getting late in spring and I wanted to get the seeds in the garden in record time, so I grabed some take out containers to use as mini greenhouses.  The only things I used were:
take out containers with sealable lids
paper towels
small stones
potting soil
seeds
vermiculite, sand, perlite (optional)
I started by placing the paper towel in the tray.  I topped the paper with some small stones.  I find that the paper towel and stones acts as a drainage system when I water the soil, keeping the roots from rotting.

I topped the stones with some potting soil, filling the container close to the top, and pressing down gently to make sure there are no air pockets or clumps of soil. 
I planted my seeds, covering them with a layer of vermiculite.  You can also use perlite, sand or more potting soil, but I get good results from vermiculite.
After watering the soil gently, I placed the cover on tightly and placed the greenhouse in a sunny spot in my yard. 

These mini-greenhouses should produce seedlings quickly. 


Once the seeds sprout, be sure to keep the lids off during the day so the plants don't burn.  After the plants get their first set of real leaves they can be gently lifted out of the tray with an old fork and transplanted elsewhere in your garden. 
Be well and Happy Gardening!

Monday, April 18, 2011

Great Garden Table

The front of my house was looking pretty scraggly.  I didn't realize how bad it looked at first, sometimes these little things seem to get past you.  But it was definetly in need of some attention, and I was ready to spruce things up a bit.

If you know me, you know I'm not going to spend money.  Why would I do that when theres nothing that a few hours of work and a few household freebies can't fix. 
I started by taking out the stepping stones and all of the plants except the citrus trees (which were too heavy to lift) and those in front of the trellises (which I wasn't planning on moving).  After I pulled the weeds that were starting to take over, I had a semi-blank slate.

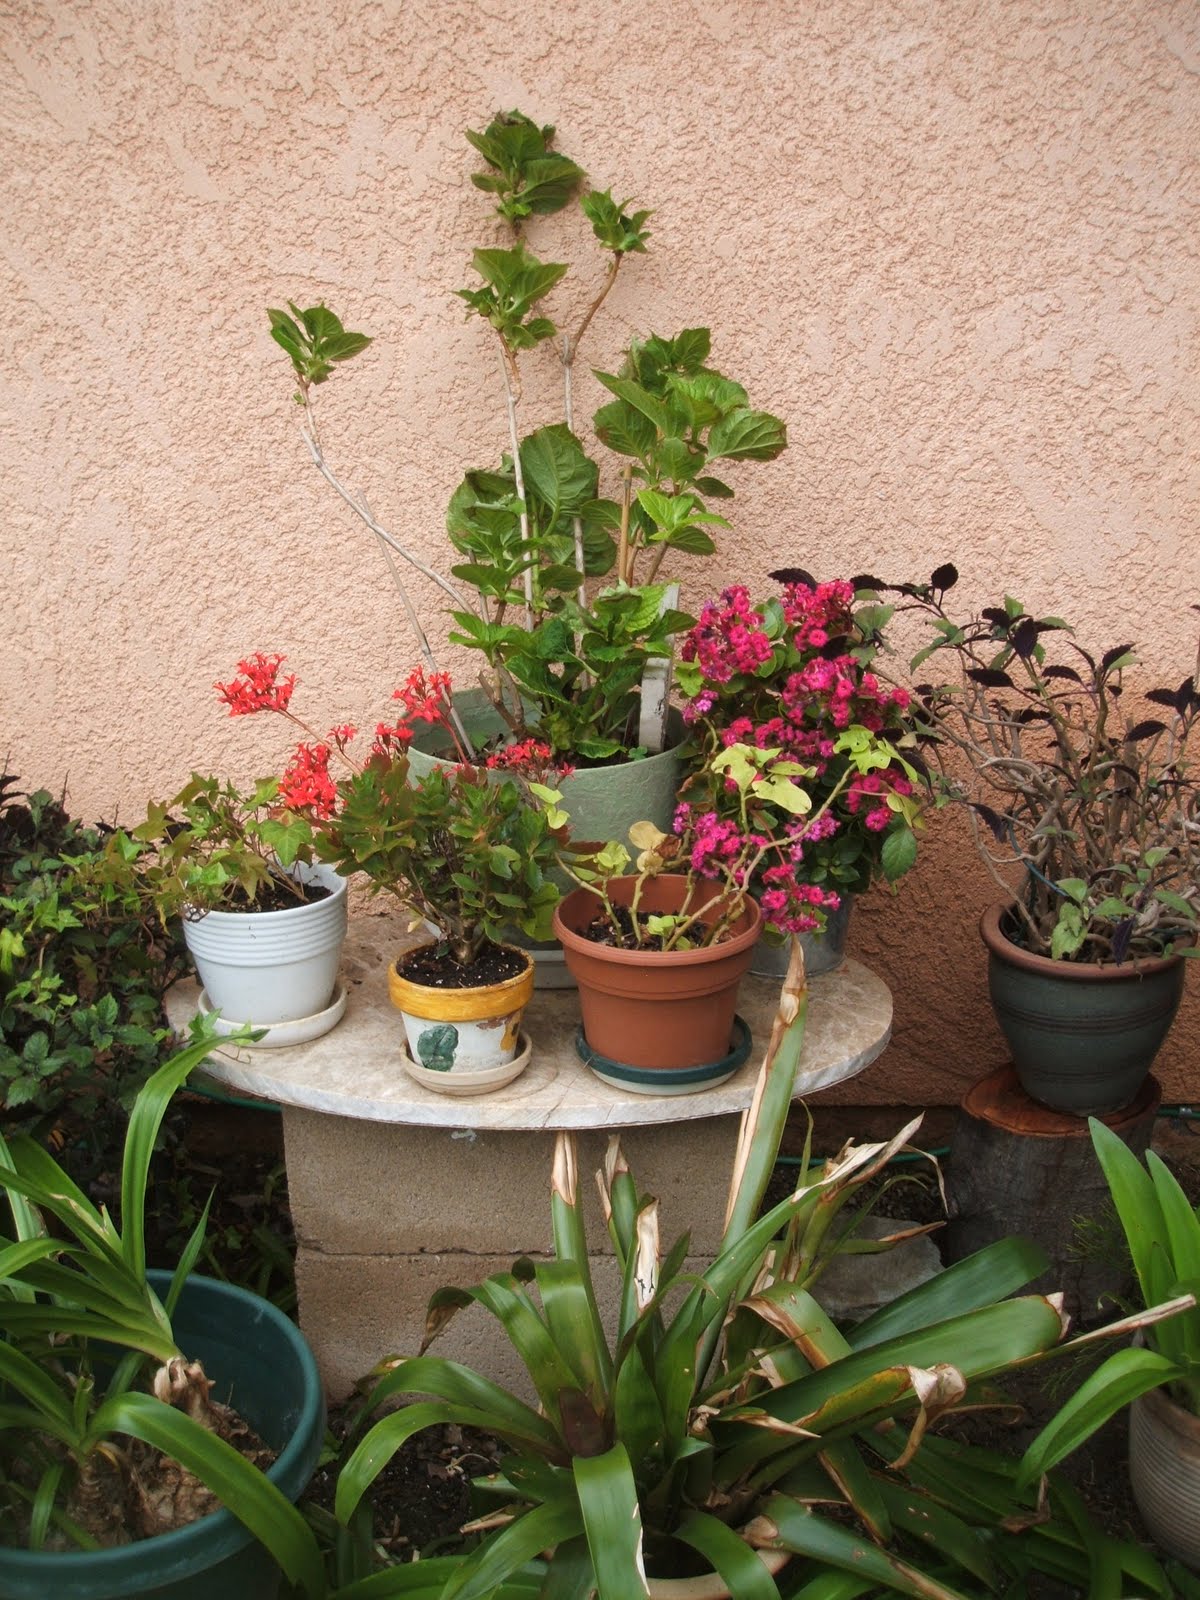
To add some height and interest to the planting area I built a makeshift table under the window.  I brought over 2 cement blocks and placed a marble disk on top.  The marble was left over from a bathroom remodeling project and the cement blocks were salvaged from a relatives yard.


You can also add more visual interest to your garden by placing plants and pots of flowers on stacked bricks or cut logs.

What a difference a few changes can make. 

I couldn't pull out the greenery at the front of the beds.  Those belong to some bulbs that have finished blooming and the leaves need to be left on the bulbs to absorb the sunlight which in turn will feed the bulbs and produce next years flowers.
I guess it's time to relax on the front porch with a glass of wine and enjoy the view.  I'll be using the wine bottles for a couple of upcoming projects so I better get to work on gathering the supplies I need.
Be well and happy gardening!

Thursday, April 14, 2011

Seed Starting with Compost Energy

I'm all for renewable energy.  I don't want to get too "political" here.  This is a gardening blog.  But renewable energy beats fossil fuels in my book any day.  Today's project uses a renewable energy source you probably haven't heard of.  It's compost energy.  Trapping the warmth from the compost bin and reusing it as a heat source for starting seeds.  I've used this method for years to start many of the annuals in my garden.  You'll only need a few materials for this project. 
One very full compost bin
One box that fits snuggly inside the bin (or as closely as possible)
Potting soil
Seeds

It's important to start with a very full compost bin.  As the comtents of the bin decompose, the box will sink and if it isn't full to start with, you will be bending over to harvest your seedlings.
The compost bin I will be using isn't quite full, and I'm ready to get started, so I used some partially composted material from another bin.  I seem to be doing a lot of that lately.  I can't seem to keep up with my compost needs.

In the past my compost bin/seed sowing method has been for plant propagation purposes only.  Once the seedlings were large enough they were transplanted elsewhere in the garden.  But I had to wonder (with an eye towards getting double duty out of my bin) if you started with a deep enough box, and with lots of sun and water, could you get something to grow here for a season.  I probably should have started with something easy, like squash.  They grow out of the compost bin on their own.  But I wanted this to be a little more interesting, a bit more challenging.  How about corn?  I have a partial packet left over from planting "the three sisters" a few days ago.  Would some corn grow here?  Why not give it a try?
With the compost bin full I placed the box on top (flaps pulled out) and filled it with potting soil.  This box took about 1 1/2 bags (2 cubic feet each) of potting soil.  I got the soil wet and planted the seeds according to the package instructions.


I filled the holes with some additional soil, pressing the soil down to make a strong contact between the soil and the seeds.  I watered the box well and added a plant marker.


Remember to keep the box well watered.  The cardboard box will hold up for about 1 season, then it can be reused under a raised garden bed or recycled.  The compost and box were free, the seeds were left over, but I did have about $1.00 invested there, and the potting soil was $6.99 a bag or about $14.00 plus tax.  Keep in mind the soil will mix with the compost and can be reused in the future, so that cost comes down a bit. 
Check back.  I will be posting pictures of the box as the corn grows.
Be well and happy gardening!

Updated 04/28/2011
The corn is doing great.  Some of the seedlings are 2" tall.  The box has already sunk quite a bit.


05/20/2011
Follow up:
The corn didn't end up doing well.  The seedlings came up great, but something (birds?) gave me problems. 
The plants were shredded and some of the stems  were broken.


Only 3 seedlings left, probably about 6 inches tall.  I might start some annual flower seeds behind the struggling corn so that I am using the growing space.
In another compost bin I started a box of zinnia seeds with a few melons in the corners. 
The zinnia seedlings are getting big and are ready to be transplanted.  I will keep the melons in the box where they will continue to grow up and over the sides of the compost bin.
Watch for weekly follow up pics.

Monday, April 11, 2011

Growing Micro Greens Indoors

Southern California winters are fairly mild.  We rarely get a frost that wipes out the lingering summer tomatoes so we get some great salads through the winter months when our leafy greens are at their best.  We aren't nearly as lucky in the summer months. The greens in our garden were already bolting by early April, long before the June tomato explosion.   While theres are tons of "other" ways to use your summer tomatoes (caprese salad, bruscetta) I still enjoy the old standby green salad once in a while, and I've been working on ways to keep the greens growing.  I recently read in an Organic Gardening magazine that you can enjoy micro greens grown inside under grow lights or in a sunny window.  I decided to give it a try using some common household products.  The only items I used were:
Plastic shoeboxes
Paper towels
Rocks (small) for drainage
Potting soil
Seeds
Plastic dry cleaning bags 

Soil drainage is important but I didn't want to drill holes in the boxes.  You never know what these boxes will be in their next life.  I layed down a layer of paper towels to absorb excess moisutre and covered it with a layer of rocks.


I filled the box with potting soil to about 1" from the top.  I planted my seeds:
Baby Mesclun Lettuce - Cut and come againn
Monet's garden mesclun
Baby leaf spinach - Catalina
All my seeds are Renee's Garden seeds.

I reused a dry cleaner bag as a cover for the boxes.  This will hold in the moisture while the seeds are germinating.

The boxes were placed under grow lights, but a sunny window would also work fine.

Once the seeds germinate I will transfer a few of the seedlings to a partly sunny/partly shady area of the garden.  The other seeds will be left in the box to grow.  The plants will be harvested quickly, when they are just an inch or two high.  Since the plants are harvested young, you probably won't need to fertilize them.  Just clip off the leaves to enjoy your favorite salad.  The clipped plants probably won't regrow, but the boxes can be replanted with another crop, or the soil can be composted and the boxes reused for another project.
Thanks to Organic Gardening Magazine for the idea and directions for this project, and for never failing to inspire me to be a better gardener and  steward of the planet.
Be well and happy gardening!

Follow-up
This is a picture of one of the micro green boxes "Cut and come again" baby mesclun lettuce.
The Catalina spinach has also germinated well.

The Monet mix didn't sprout at all prompting me to wonder if I put seeds in the box at all.  I just might have missed a step.

Update on 04/28/2011
My seedlings are about 2" tall and could be transplanted now or allowed to grow a bit more and enjoyed in a salad.


05/20/2011
Follow up:
The lettuce is doing well.  I have pinched off some leaves for salads as well as transplanted a bit of it in the garden.

Here's to keeping the greens growing.